(Special thanks to Jolt135 and Crandor for many of the combos in this deck,
mqj for pointing out a rules error in the article,
and Gatherer for the images I'm leeching.
Written by metroid composite. Original discussion
here
and here).
What's the highest, non-infinite-combo damage you can do on turn one?
The rules of this game are simple. You have a Vintage-legal deck. Your opponent has all Islands.dec.
Your deck must not have a way to go infinite (sometimes these can be very subtle, so watch out!) You
can assume all chance events go the way you want them to (perfect draw, win all your coinflips). You
may not have more than 60 cards in your deck, and your sideboard has 0 cards (so no, you can't make your
deck 74 cards by copying Burning Wish 14 times).
What's
the most damage you can deal? This was the question we asked ourselves, and this article describes the
outcome of our mad science.
Introduction -- Strategies
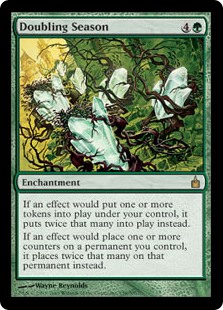
Imagine the following scenario: you have four Kiki-Jikis
in the battlefield (thanks to Mirror Gallery), and you
start tapping them targetting Doubling Season,
which you can do thanks to
Opalescence.
A token that's a copy of Doubling Season comes into the battlefield...but wait! When a token comes into
the battlefield, Doubling Season says we put twice that many tokens instead. So...we have 3 Doubling
Seasons in the battlefield.
We make a second token...but wait! Doubling Season #1 says twice that (2 tokens) Doubling Season #2 says
twice that (4 tokens) and Doubling Season #3 says twice that (8 tokens). Now we have 11 Doubling
Seasons in the battlefield.
We make 2*2*2*2*2*2*2*2*2*2*2 = 2^11 = 2048 copies of Doubling Season. Now we have 2059 Doubling
Seasons in the battlefield.
 We put 2^2059 copies of Doubling Season into play (that's a lot).
...and then we tap Serra's Sanctum
for
66,![]() 185,
185,![]() 228,
228,![]() 434,
434,![]() 044,
044,![]() 942,
942,![]() 951,
951,![]() 864,
864,![]() 067,
067,![]() 458,
458,![]() 396,
396,![]() 061,
061,![]() 614,
614,![]() 989,
989,![]() 522,
522,![]() 267,
267,![]() 577,
577,![]() 311,
311,![]() 297,
297,![]() 802,
802,![]() 947,
947,![]() 435,
435,![]() 570,
570,![]() 493,
493,![]() 724,
724,![]() 401,
401,![]() 440,
440,![]() 549,
549,![]() 267,
267,![]() 868,
868,![]() 490,
490,![]() 798,
798,![]() 926,
926,![]() 773,
773,![]() 634,
634,![]() 494,
494,![]() 383,
383,![]() 968,
968,![]() 047,
047,![]() 143,
143,![]() 923,
923,![]() 956,
956,![]() 857,
857,![]() 140,
140,![]() 205,
205,![]() 406,
406,![]() 402,
402,![]() 740,
740,![]() 536,
536,![]() 087,
087,![]() 446,
446,![]() 083,
083,![]() 831,
831,![]() 052,
052,![]() 036,
036,![]() 848,
848,![]() 232,
232,![]() 439,
439,![]() 995,
995,![]() 904,
904,![]() 404,
404,![]() 992,
992,![]() 798,
798,![]() 007,
007,![]() 514,
514,![]() 718,
718,![]() 326,
326,![]() 043,
043,![]() 410,
410,![]() 570,
570,![]() 379,
379,![]() 830,
830,![]() 870,
870,![]() 463,
463,![]() 780,
780,![]() 085,
085,![]() 260,
260,![]() 619,
619,![]() 444,
444,![]() 417,
417,![]() 205,
205,![]() 199,
199,![]() 197,
197,![]() 123,
123,![]() 751,
751,![]() 210,
210,![]() 704,
704,![]() 970,
970,![]() 352,
352,![]() 727,
727,![]() 833,
833,![]() 755,
755,![]() 425,
425,![]() 876,
876,![]() 102,
102,![]() 776,
776,![]() 028,
028,![]() 267,
267,![]() 313,
313,![]() 405,
405,![]() 809,
809,![]() 429,
429,![]() 548,
548,![]() 880,
880,![]() 554,
554,![]() 782,
782,![]() 040,
040,![]() 765,
765,![]() 277,
277,![]() 562,
562,![]() 828,
828,![]() 362,
362,![]() 884,
884,![]() 238,
238,![]() 325,
325,![]() 465,
465,![]() 448,
448,![]() 520,
520,![]() 348,
348,![]() 307,
307,![]() 574,
574,![]() 943,
943,![]() 345,
345,![]() 990,
990,![]() 309,
309,![]() 941,
941,![]() 642,
642,![]() 666,
666,![]() 926,
926,![]() 723,
723,![]() 379,
379,![]() 729,
729,![]() 598,
598,![]() 185,
185,![]() 834,
834,![]() 735,
735,![]() 054,
054,![]() 732,
732,![]() 500,
500,![]() 415,
415,![]() 409,
409,![]() 883,
883,![]() 868,
868,![]() 361,
361,![]() 423,
423,![]() 159,
159,![]() 913,
913,![]() 770,
770,![]() 812,
812,![]() 218,
218,![]() 772,
772,![]() 711,
711,![]() 901,
901,![]() 772,
772,![]() 249,
249,![]() 553,
553,![]() 153,
153,![]() 402,
402,![]() 287,
287,![]() 759,
759,![]() 789,
789,![]() 517,
517,![]() 121,
121,![]() 744,
744,![]() 336,
336,![]() 755,
755,![]() 350,
350,![]() 465,
465,![]() 901,
901,![]() 655,
655,![]() 205,
205,![]() 184,
184,![]() 917,
917,![]() 370,
370,![]() 974,
974,![]() 202,
202,![]() 405,
405,![]() 586,
586,![]() 941,
941,![]() 211,
211,![]() 065,
065,![]() 395,
395,![]() 540,
540,![]() 765,
765,![]() 567,
567,![]() 663,
663,![]() 193,
193,![]() 297,
297,![]() 173,
173,![]() 367,
367,![]() 254,
254,![]() 230,
230,![]() 313,
313,![]() 612,
612,![]() 244,
244,![]() 182,
182,![]() 941,
941,![]() 999,
999,![]() 500,
500,![]() 402,
402,![]() 388,
388,![]() 195,
195,![]() 450,
450,![]() 053,
053,![]() 080,
080,![]() 385,
385,![]() 548
mana.
548
mana.
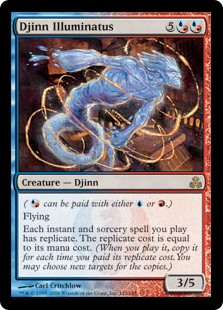
 And then we use
Djinn Illuminatus
to replicate
Burst of Energy,
untapping Kiki-Jiki
66,
And then we use
Djinn Illuminatus
to replicate
Burst of Energy,
untapping Kiki-Jiki
66,![]() 185,
185,![]() 228,
228,![]() 434,
434,![]() 044,
044,![]() 942,
942,![]() 951,
951,![]() 864,
864,![]() 067,
067,![]() 458,
458,![]() 396,
396,![]() 061,
061,![]() 614,
614,![]() 989,
989,![]() 522,
522,![]() 267,
267,![]() 577,
577,![]() 311,
311,![]() 297,
297,![]() 802,
802,![]() 947,
947,![]() 435,
435,![]() 570,
570,![]() 493,
493,![]() 724,
724,![]() 401,
401,![]() 440,
440,![]() 549,
549,![]() 267,
267,![]() 868,
868,![]() 490,
490,![]() 798,
798,![]() 926,
926,![]() 773,
773,![]() 634,
634,![]() 494,
494,![]() 383,
383,![]() 968,
968,![]() 047,
047,![]() 143,
143,![]() 923,
923,![]() 956,
956,![]() 857,
857,![]() 140,
140,![]() 205,
205,![]() 406,
406,![]() 402,
402,![]() 740,
740,![]() 536,
536,![]() 087,
087,![]() 446,
446,![]() 083,
083,![]() 831,
831,![]() 052,
052,![]() 036,
036,![]() 848,
848,![]() 232,
232,![]() 439,
439,![]() 995,
995,![]() 904,
904,![]() 404,
404,![]() 992,
992,![]() 798,
798,![]() 007,
007,![]() 514,
514,![]() 718,
718,![]() 326,
326,![]() 043,
043,![]() 410,
410,![]() 570,
570,![]() 379,
379,![]() 830,
830,![]() 870,
870,![]() 463,
463,![]() 780,
780,![]() 085,
085,![]() 260,
260,![]() 619,
619,![]() 444,
444,![]() 417,
417,![]() 205,
205,![]() 199,
199,![]() 197,
197,![]() 123,
123,![]() 751,
751,![]() 210,
210,![]() 704,
704,![]() 970,
970,![]() 352,
352,![]() 727,
727,![]() 833,
833,![]() 755,
755,![]() 425,
425,![]() 876,
876,![]() 102,
102,![]() 776,
776,![]() 028,
028,![]() 267,
267,![]() 313,
313,![]() 405,
405,![]() 809,
809,![]() 429,
429,![]() 548,
548,![]() 880,
880,![]() 554,
554,![]() 782,
782,![]() 040,
040,![]() 765,
765,![]() 277,
277,![]() 562,
562,![]() 828,
828,![]() 362,
362,![]() 884,
884,![]() 238,
238,![]() 325,
325,![]() 465,
465,![]() 448,
448,![]() 520,
520,![]() 348,
348,![]() 307,
307,![]() 574,
574,![]() 943,
943,![]() 345,
345,![]() 990,
990,![]() 309,
309,![]() 941,
941,![]() 642,
642,![]() 666,
666,![]() 926,
926,![]() 723,
723,![]() 379,
379,![]() 729,
729,![]() 598,
598,![]() 185,
185,![]() 834,
834,![]() 735,
735,![]() 054,
054,![]() 732,
732,![]() 500,
500,![]() 415,
415,![]() 409,
409,![]() 883,
883,![]() 868,
868,![]() 361,
361,![]() 423,
423,![]() 159,
159,![]() 913,
913,![]() 770,
770,![]() 812,
812,![]() 218,
218,![]() 772,
772,![]() 711,
711,![]() 901,
901,![]() 772,
772,![]() 249,
249,![]() 553,
553,![]() 153,
153,![]() 402,
402,![]() 287,
287,![]() 759,
759,![]() 789,
789,![]() 517,
517,![]() 121,
121,![]() 744,
744,![]() 336,
336,![]() 755,
755,![]() 350,
350,![]() 465,
465,![]() 901,
901,![]() 655,
655,![]() 205,
205,![]() 184,
184,![]() 917,
917,![]() 370,
370,![]() 974,
974,![]() 202,
202,![]() 405,
405,![]() 586,
586,![]() 941,
941,![]() 211,
211,![]() 065,
065,![]() 395,
395,![]() 540,
540,![]() 765,
765,![]() 567,
567,![]() 663,
663,![]() 193,
193,![]() 297,
297,![]() 173,
173,![]() 367,
367,![]() 254,
254,![]() 230,
230,![]() 313,
313,![]() 612,
612,![]() 244,
244,![]() 182,
182,![]() 941,
941,![]() 999,
999,![]() 500,
500,![]() 402,
402,![]() 388,
388,![]() 195,
195,![]() 450,
450,![]() 053,
053,![]() 080,
080,![]() 385,
385,![]() 548
times
(and every time Kiki-Jiki untaps, we're going to tap him again to copy more
Doubling Seasons!)
548
times
(and every time Kiki-Jiki untaps, we're going to tap him again to copy more
Doubling Seasons!)
Time-out for a moment, audience check: if you're grinning with glee right now, this article is
probably for you, stick around and grab some popcorn. On the other hand if you're hissing, holding
up garlic to the screen, and yelling 'the math, it burns!' trust me: it's only going to get worse.
Get out now while you still can!
Tips and Strategies
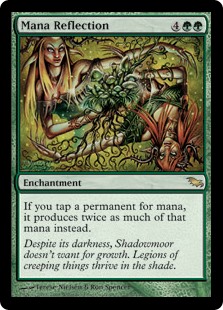 There's a number of things to watch out for when trying to build on the combo; remember the maximum of
60 cards in the deck--you want to make sure that every card you add makes a real impact. For instance,
if we used one Mana Reflection to boost Serra's Sanctum, it really wouldn't have that big of an effect.
If we were to instead start with two Doubling Seasons in play, we'd do a fair bit better--it would go
2 -> 6 -> 70 -> 2^70 -> 2^(2^70), and then we tap for 2^(2^70). That'll boost the output of Serra's Sanctum
by a lot more than a single mana reflection will (which makes it tap for twice 2^(2059), so 2^(2060)).
Notice just how much smaller 2060 is than 2^70 =
1,
There's a number of things to watch out for when trying to build on the combo; remember the maximum of
60 cards in the deck--you want to make sure that every card you add makes a real impact. For instance,
if we used one Mana Reflection to boost Serra's Sanctum, it really wouldn't have that big of an effect.
If we were to instead start with two Doubling Seasons in play, we'd do a fair bit better--it would go
2 -> 6 -> 70 -> 2^70 -> 2^(2^70), and then we tap for 2^(2^70). That'll boost the output of Serra's Sanctum
by a lot more than a single mana reflection will (which makes it tap for twice 2^(2059), so 2^(2060)).
Notice just how much smaller 2060 is than 2^70 =
1,![]() 180,
180,![]() 591,
591,![]() 620,
620,![]() 717,
717,![]() 411,
411,![]() 303,
303,![]() 424
424
But we can STILL do better than a second Doubling Season. If instead of that, we had a second
Burst of Energy in our hand, well...that's going to be way WAY bigger in impact. We get to replicate
Burst of Energy after Kiki-Jiki has untapped and copied Doubling Season bazillions of times.
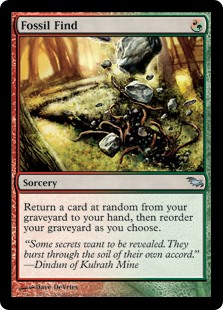 Now is THAT the best we can do? Well...no, actually, it's not. What if we were able to return
Burst of Energy over and over and over again from our graveyard by replicating oh, say, Fossil Find
cast using Gaea's Cradle
(and using Burst of Energy + replicate in between each Fossil Find copy).
Then, instead of just casting and replicating Burst of Energy twice, we're doing it a bazillion times.
Now is THAT the best we can do? Well...no, actually, it's not. What if we were able to return
Burst of Energy over and over and over again from our graveyard by replicating oh, say, Fossil Find
cast using Gaea's Cradle
(and using Burst of Energy + replicate in between each Fossil Find copy).
Then, instead of just casting and replicating Burst of Energy twice, we're doing it a bazillion times.
Layers are Everything -- Run Narrower Cards
You'll notice in the example above that adding an extra layer of repetition by adding in Fossil Find
made a much, much bigger impact than trying to get more of the same effect. You'll notice also that
it took the form of
'repeat this action until you run out of [resource]'.
In the case above, the
first layer was the copies of Burst of Energy on the stack:
'Untap Kiki-Jiki and copy a Doubling season for each Burst of Energy on the stack'
The second layer was the number of Fossil Finds on the stack:
'Tap Serra's Sanctum and replicate Burst of Energy a LOT of times for each Fossil Find on the stack'
 Now, note that some of our earlier builds were running cards like Mycosynth Lattice--this meant
that instead of having six different kinds of mana (all five colours and colourless) we had a single
kind of mana, and therefore fewer total resource pools. And with fewer resource pools we got
fewer layers of recursion (i.e. we couldn't say 'do [task] until you run out of green mana').
Now, note that some of our earlier builds were running cards like Mycosynth Lattice--this meant
that instead of having six different kinds of mana (all five colours and colourless) we had a single
kind of mana, and therefore fewer total resource pools. And with fewer resource pools we got
fewer layers of recursion (i.e. we couldn't say 'do [task] until you run out of green mana').
Later on, it became obvious that we could add many layers if we used the soulshift
mechanic but soulshift enablers were incompatible with our 'mana matters' enablers. so we asked ourselves
'which one gives more layers?' (Turns out the answer was soulshift). Again, what really matters is getting
the most layers of recursion, so out with the 'mana matters' cards and in with the soulshift cards.
Some terminology for layers
I'm going to be using Knuth's up arrow
Notation. The idea of this is very simple:
5+5 = 5 + 1 + 1 + 1 + 1 + 1.
5*5 = 5 + 5 + 5 + 5 + 5.
5^5 = 5 * 5 * 5 * 5 * 5.
The philosophy behind Knuth's up arrow notation is 'why stop at three functions?'
5^^5 = 5^(5^(5^(5^5))).
5^^^5 = 5^^(5^^(5^^(5^^5))).
5^^^^5 = 5^^^(5^^^(5^^^(5^^^5))).
 And so on. So, okay, let's remember our Doubling Season example above. Each time Kiki-Jiki copied
Doubling Season, it counted X the previous number of Doubling Seasons, and adds 2^X more.
Ignoring the adding part (which becomes insignificant pretty fast) it just does a 2^X increase.
So if we do a copy with each of the four Kiki-Jikis, we get
roughly 2^(2^(2^(2^2)))) = 2^^5. When we replicated Burst of energy 2^2059 times, what we got
was something more-like 2^^( 2^2059 ). And then if we added in the replicated
Fossil Find layer above all that,
that means we're doing the 2^^() effect from Burst of Energy over and over, i.e. 2^^(2^^(2^^(2^^(...)))).
Though hey, that looks familiar--in fact it looks rather like 2^^^(X). And then if we had some way to
repeatedly bring back Fossil Find, we could up the ante again by doing 2^^^(2^^^(2^^^(...))), or
roughly 2^^^^X.
And so on. So, okay, let's remember our Doubling Season example above. Each time Kiki-Jiki copied
Doubling Season, it counted X the previous number of Doubling Seasons, and adds 2^X more.
Ignoring the adding part (which becomes insignificant pretty fast) it just does a 2^X increase.
So if we do a copy with each of the four Kiki-Jikis, we get
roughly 2^(2^(2^(2^2)))) = 2^^5. When we replicated Burst of energy 2^2059 times, what we got
was something more-like 2^^( 2^2059 ). And then if we added in the replicated
Fossil Find layer above all that,
that means we're doing the 2^^() effect from Burst of Energy over and over, i.e. 2^^(2^^(2^^(2^^(...)))).
Though hey, that looks familiar--in fact it looks rather like 2^^^(X). And then if we had some way to
repeatedly bring back Fossil Find, we could up the ante again by doing 2^^^(2^^^(2^^^(...))), or
roughly 2^^^^X.
Don't spend too much time worrying about what these numbers actually look like.
Suffice it to say...
1. The numbers quickly get wayyyyyyy bigger than anything you could write in Scientific notation.
2. The only really important thing to watch is how many layers of recursion there are. Finding a way
to spend two mana instead of three on a spell you're replicating quickly becomes barely-noticeable when
the numbers are so large.
Finding a way to cast your best spell a zillion times, however, is always a big deal (especially
since you get a LOT more mana for the next replication after each casting).
Outline of current best deck
All of the above is just an example--many of those cards are not in the current 'best deck' candidate.
The best deck keeps changing as people think of new combos, so some sections are not fully written;
sorry for the places heavy on shorthand and short on humor.
The entire deck changed recently.
For the curious, the old deck is archived
here
Layer 0, the kickstart
Black Lotus, Seething Song, Manamorphose, Wheel and Deal, Cabal Ritual, Dream Salvage,
Eureka
How it works
Opening Hand:
1. Black Lotus (RRR, 6 cards in hand)
2. Seething Song (RRRRR, 5 cards in hand)
3. Seething Song (RRRRRRR, 4 cards)
4. Seething Song (RRRRRRRRR, 3 cards)
5. Seething Song (RRRRRRRRRRR, 2 cards)
6. Manamorphose (UBRRRRRRRRR, 2 cards)
7. Wheel and Deal (BRRRRRR, 2 cards)
8. Cabal Ritual (BBBBBRRRRR, 1 card)
9. Dream Salvage (BBBBRRRRR, 7 cards)
10. Cabal Ritual (BBBBBBBRRRRR, 6 cards)
11. Mirari (BBRRRRR, 5 cards)
12. Cabal Ritual copied (BBBBBBBBBBRR, 4 cards)
13. Dream Salvage, copied (BBBBBBRR, 17 cards)
14. Dream Salvage, copied (BBRR, 30 cards)
15. Manamorphose (GGBR, 30 cards)
16. Eureka (-, 29 cards)
At this point, Eureka puts half your hand into the battlefield
(Opalescence, March of the Machines, Minion Reflector, Doubling Season, Phyrexian Altar,
Hanna, Ship's Navigator, Rings of Brighthearth, Vedalken Orrery, Mirror Gallery
Norritt, Hana Kami, Deathknell Kami, Elder Pine of Jukai, Rootrunner, Forked-Branch Garami,
Nightsoil Kami, Vine Kami, Thousand-legged Kami, Body of Jukai, Kiki-Jiki, Nature's Revolt,
Karakas,
Hunted Lammasu, Holistic Wisdom).
Now we're going to stack all the Minion Reflector triggers roughly in the relevant order from the combo.
Here's two very useful points about Minion Reflector
triggers. #1 We don't have to pay the 2-mana until we get to the triggered ability on the stack.
#2 If the creature Minion Reflector was copying leaves the battlefield before the trigger resolves,
it STILL makes a copy using 'Last Known Information'.
Anyhow, before we let ANY of the stack resolve, we're going to tap Kiki Jiki, and we're going to copy
that with Rings of Brighthearth. In order to get 2 mana for Rings of Brighthearth, we take advantage of the
'Last Known Information' trick, and sacrifice a couple
things we don't need multiple copies of (say Holistic Wisdom and Hunted Lammasu) to Phyrexian Altar.
The Kiki-Jiki ability and its copy bring us from 1 Doubling Season to
11 Doubling Seasons. Now pay
for the Minion Reflector trigger on Doubling Season, again using the Last Known Information trick with Phyrexian Altar on some more
things we don't need in multiples like Holistic Wisdom and Vedalken Orrery (2059 Doubling Seasons now). Then use the 'Last
Known Information' trick again to sac a couple more things we don't need to Phyrexian Altar
(Let's say the non-hasty versions of Hanna, Ship's Navigator and Norritt). Now let the
Minion Reflector triggers resolve on anything where we have no use for multiples (Vedalken Orrery,
Phyrexian Altar, Hunted Lammasu, Holistic Wisdom, Mirror Gallery, Nature's Revolt)
putting 2^2059 of each of them into play...which is to say 6*2^2059 mana of any colour in our mana pool.
That's more than enough to launch into the combo.
Checking for infinite combos
I'm going to focus on the collection of fast mana and card draw used to kickstart the deck
(Black Lotus, Seething Song, Manamorphose, Wheel and Deal, Cabal Ritual, Dream Salvage).
Black Lotus is the one potentially dangerous one with Hanna, Ship's Navigator, but we have
only two things in-play
that can untap her--Norritt, and bouncing her with
Karakas, and certainly no way to untap her with mana alone--every route to untap her in the deck
uses up non-mana resources that can't be replenished using only mana (either tapping a permanent, or
sacrificing a permanent, or casting a spell).
Note that Minion Reflector actually can let you get extra mana out of Black Lotus, because
if March of the Machines
is in play, Black Lotus dies as a state based action before triggered abilities go on the stack. However
the Minion Reflector trigger still goes on the stack, and so copies the Last Known Information about
the creature, and so it copies all 'copiable values'--specifically
'Other effects (including type-changing and text-changing effects), status, and counters are not copied.'
Which means that if we sac each copy of March of the Machines, the Black Lotus tokens will enter the
battlefield as non-creature artifacts. Doubling Season only cares that they are tokens, so it multiplies
them, potentially producing a lot of mana.
However...this is only three times as much mana as we could
have gotten by using any other animated artifact or enchantment with Hanna, Ship's Navigator
(since any of them can be sacced to Phyrexian Altar)...and
probably less mana than we would get out of bouncing and recasting Doubling Season (assuming there
are multiple Minion Reflectors in play, once we get to the second trigger we will most likely be
putting much, much more than triple the permanents into the battlefield).
Doubling Season, Opalescence, Minion Reflector, March of the Machines, Phyrexian Altar
How it works
Play Doubling Season from your hand (you will need to sac 5 permanents to Phyrexian Altar do so).
Now, X triggers go on the stack, where X is the number of Minion Reflectors you have.
These triggers resolve one at a time, and when they do resolve, you want to pay the trigger
(saccing a couple Doubling Seasons if needed--you will put many many more than 2 Doubling Seasons
into play when you do this).
Now we have X triggers that will put a token copy of Doubling
Season into the battlefield. Each one will 2^X the number of Doubling Seasons,
meaning the next token to
enter the battlefield makes even more tokens and so on. So we get...
2^(2^(2^(2^(...^(2^X)...)))), or roughly 2^^X.
Hanna, Ship's Navigator,
Rings of Brighthearth,
Vedalken Orrery
Mirror Gallery
How it works
Tap Hanna, Ship's Navigator and copy her X times, where X the number of Rings of Brighthearth we have
in play (we will want to alternate between returning Minion Reflector and returning Doubling Season, and
naturally we need Vedalken Orrery to play Minion Reflector/Doubling Season in between each
Rings of Brighthearth trigger resolution).
Surprisingly enough, this actually doesn't require redirection, even though
it's targeted. The stack ends up looking like this (thanks Crandor!)
* copy of Hanna, Ship's Navigator's activated ability
* Rings of Brighthearth triggered ability
* Rings of Brighthearth triggered ability
* Rings of Brighthearth triggered ability
...
* Rings of Brighthearth triggered ability
* Rings of Brighthearth triggered ability
* Rings of Brighthearth triggered ability
* Hanna, Ship's Navigator's activated ability
So we can resolve one trigger at a time, and at the time we resolve the trigger we
get to choose new targets for the copy. Hence the only copy that will fizzle to to a missing target is
the original Hanna, Ship's Navigator activation. We also don't need to (and can't) pay for all the
Rings of Brighthearth all at once, so feel free to sac permanents two at a time (in between putting
2^^X permanents into play each time). Once every Rings of Brighthearth trigger has been used
we'll have done 2^^^X overall.
Using the Stack
This is something we will do repeatedly throughout this combo. We let a single Rings of Brighthearth
trigger resolve, and then we bounce and make lots and lots of copies of either Doubling Season or
Minion Reflector, often putting lots of triggers onto the stack. However, ALL these triggers go
on top of the stack, and therefore all resolve first.
In other words the Rings of Brighthearth triggered abilities simply sit and wait until we're
done all our crazy copy shenanigans. Once all of that's done, the next Rings of Brighthearth trigger
will once again be the top of the stack.
This is something we're going to use at basically every layer of the combo. These Layer 3 triggers
will be higher on the stack than the Layer 4 triggers, so we will exhaust all our Layer 3 triggers
before moving on to the next single Layer 4 trigger. The Layer 4 triggers will be higher on the
stack than the Layer 5 replications. The Layer 5 replications will be higher on the stack than the
Layer 6 triggers. And so on.
Norritt
How it works
We're going to tap Norritt to untap Hanna, Ship's Navigator, and much like Hanna, every time we tap
Norritt we're going to copy the ability X times with Rings of Brighthearth (note that towards the end
of each Hannah tap, we will want to replay Rings of Brighthearth at least once so that X is always
roughly equal to the number of Doubling Seasons). Now we're up to 2^^^^X.
Blind with Anger, Mirari
How it works
We are going to copy Blind with Anger X times to untap Norritt X times (obviously we bounce and replay Mirari as the final bounce
right before casting Blind with Anger). Each time Norritt untaps we 2^^^^() the number of
permanents, so overall we get 2^^^^(2^^^^(2^^^^(...))) for a total effect of 2^^^^^X.
Avoiding infinites
One might reasonably ask why we're not using the much better Arcane card for this task, Psychic Puppetry.
The reason is that Psychic Puppetry goes infinite with Kiki-Jiki and Hana Kami.
On Mirari: note that the triggers only go on the stack when we cast the spell, and are limited to the number of copies of Mirari
in play.
Hana Kami
How it works
Sac Hana Kami, copy X times with Rings of Brighthearth, returning Blind with Anger each time (note that we don't
need a redirection ability to return the same card from the graveyard each time--see the section
'Layer 3: Hanna, Ship's Navigator': we can use the nature of the copy triggers to choose targets only when
Blind with Anger is in the graveyard). Every time we return Blind with Anger we 2^^^^^() the number of Doubling
Seasons, so this gets us 2^^^^^^X.
Layer 7 & 8: re-play Hana Kami
Deathknell Kami
How it works
Sac a Deathknell Kami to return Hana Kami to hand.
Play Hana Kami. Let X Minion Reflectors go on the stack. Let them resolve one by one. Each time
one resolves, we put X Hana Kamis into play, which we sac one at a time so that the first one
gets copied X times, giving us 2^^^^^^X Doubling Seasons and more importantly 2^^^^^^X
Rings of Brighthearth,
and so the second one gets copied 2^^^^^^X times, the third one gets copied
2^^^^^^(2^^^^^^X) times, and so on, resulting in 2^^^^^^^X. But that was the result over just one
resolved trigger--now let the next trigger resolve, which, thanks to Doubling Season
will put 2^^^^^^^X Hana Kamis into play. And then the NEXT trigger will put
2^^^^^^^(2^^^^^^^X) Hana Kamis, and so on. Overall we get 2^^^^^^^^X.
Layer 9&10, 11&12, 13&14, 15&16, 17&18, 19&20, 21&22: Soulshift 2, 3, 4, 5, 6, 7, and 8
Elder Pine of Jukai,
Rootrunner,
Forked-Branch Garami,
Nightsoil Kami,
Vine Kami,
Thousand-legged Kami,
Body of Jukai
How it works
See that trick in the above section about letting Hana Kami's Minion Reflector triggers resolve one at
a time and doing lots of copying between each time? Same idea, repeated for 7 layers of Soulshift
(Elder Pine of Jukai gets Deathknell Kami, Rootrunner gets Elder Pine of Jukai and so on).
This brings us up to 2^^^^^^^^^^^^^^^^^^^^^^X.
Avoiding infinites
Soulshift is a very conveniently designed mechanic to avoid infinites. They can only return spirits
with converted mana cost less than themselves.
Kiki-Jiki
How it works
You might have noticed that we can't return Body of Jukai using Soulshift.
Instead of returning Body of Jukai to your hand and replaying it, we're
using Kiki-Jiki on it, and then copying Kiki-Jiki's ability X times with Rings of Brighthearth.
This brings us to 2^^^^^^^^^^^^^^^^^^^^^^^^X
Layer 25&26&27, bounce Kiki-Jiki
Karakas
How it works
Tap Karakas and copy the ability X times with Rings of Brighthearth. Then, when you replay Kiki-Jiki,
do the
same as all the soulshift creatures
we played from our hand. X triggers from Minion Reflector. Let them resolve one at a
time. Doubling Season makes sure each individual trigger puts more Kiki-Jikis into play than there
are currently Doubling Seasons. Two layers for a creature entering the battlefield, and one for
the fact that we're getting X bounces gives us 2^^^^^^^^^^^^^^^^^^^^^^^^^^^X
Avoiding infinites
Karakas can't be untapped by Blind with Anger, and can't be targetted with Kiki-Jiki, and while it can
return itself if it's a creature, the one-land-per-turn rule stops you from replaying
it and thus prevents the infinite.
Layer 28&29&30, bounce and replay Karakas
Wargate, Nature's Revolt
How it works
Rootrunner puts Karakas on top of the library. Wargate for 0 (which we will copy X times with
Mirari)
puts Karkas into play. Nature's Revolt means that we get to play the same old tricks with creatures
coming into play (X triggers from the Minion Reflectors, let them resolve one at a time, each one
putting more and more Karakases into the battlefield). This brings us to
2^^^^^^^^^^^^^^^^^^^^^^^^^^^^^^X.
One thing to be careful of is do NOT cast a Spirit or Arcane spell in between putting Karakas on top of
your library with Rootrunner and letting the Wargate copy resolve. If you do cast a Spirit or
Arcane spell, Elder Pine of Jukai's non-optional ability will
trigger above the Wargate, and Karakas will be stuck in your hand forever; can't play it, can't get it
back into your library. Obviously if we could replace Elder Pine of Jukai we would, but the only other
option for Soulshift 2 is Thief of Hope (which makes the opponent die prematurely, so is much much worse).
Avoiding infinites
Rootrunner can only put lands on top of the library, and is the only card in the deck
that can put cards on top of the library, otherwise there could be real danger here with Wargate.
Reborn Hope
How it works
Cast Reborn Hope and X Mirari triggers go on the stack. Much like with Hanna, Ship's Navigator and
Rings of Brighthearth, notice
that we don't need a redirection spell or ability to make each of these triggers bring back Wargate.
The stack ends up looking like this
* copy of Reborn Hope
* Mirari triggered ability
* Mirari triggered ability
* Mirari triggered ability
...
* Mirari triggered ability
* Mirari triggered ability
* Mirari triggered ability
* Reborn Hope, original spell
So we can resolve one trigger at a time, and at the time we resolve the trigger we
get to choose new targets for the copy (namely Wargate).
We get one layer out of this (X castings of Wargate) so 2^^^^^^^^^^^^^^^^^^^^^^^^^^^^^^^X.
Avoiding infinites
The way the stack works, when you cast Reborn Hope, all the Mirari triggers go onto the stack on top
of Reborn Hope, and they all resolve first, and then finally the original Reborn Hope resolves
and cannot return itself because it is not yet in the graveyard.
D�j� Vu
How it works
Copy D�j� Vu with Mirari to return Reborn Hope every time. Now we're at 2^^^^^^^^^^^^^^^^^^^^^^^^^^^^^^^^X.
Avoiding infinites
You'll note that D�j� Vu can return Reborn Hope, but Reborn Hope can't return D�j� Vu. Similarly,
Reap can return D�j� Vu, but NONE of the above spells
can return Reap, being a monocolour non-Sorcery card. Twincast, much like Reap can't be returned by
D�j� Vu or Reborn Hope. Reap can return Twincast, but Twincast can't return Reap, because
if Reap is in the graveyard, there are no Reap spells for Twincast to copy, and no other spell Twincast
can copy will return Reap.
Reap, Hunted Lammasu
How it works
Cast Reap (Hunted Lammasu makes sure the opponent has at least one black permanent), and let the Mirari triggers go on the stack.
Now before any of these triggers resolve,
cast Twincast and let the Mirari triggers go on the stack for that. All of the Twincast Mirari triggers resolve before
a single Reap trigger resolves. Turn each Twincast into a Reap, and have each of these return D�j� Vu. When
the Mirari triggers for Twincast finally run out, have a single trigger resolve for Reap, return Twincast,
cast Twincast immediately and do it all again (except this time with a lot more Mirari Twincast triggers).
Each time we cast a Twincast, we get X
Mirari triggers leading us to 2^^^^^^^^^^^^^^^^^^^^^^^^^^^^^^^^^X. Each time we cast a Reap, we get X castings of Twincast
leading us to 2^^^^^^^^^^^^^^^^^^^^^^^^^^^^^^^^^^X.
Avoiding infinites
When the actual physical Twincast spell resolves, things go in this order:
1. A copy of Reap is put onto the stack.
2. You choose new targets for the copy.
3. Twincast is finished resolving, and so goes to the graveyard.
This sounds quite dangerous, since the Reap copy created by Twincast is still on the stack when Twincast goes to the graveyard.
However because we chose new targets for the Reap copy before Twincast was put in the graveyard, it can't target Twincast itself,
and we have no redirection in this deck, so we can't change the target of our Twincast-created copy to return the physical Twincast
card. Hence Twincast can not return itself.
Holistic Wisdom
How it works
Remove an instant from your hand to Holistic Wisdom, and then copy Holistic Wisdom X times, where
X is the number of Rings of Brighthearth we have in play (for each copy,
return Reap). Once again, this doesn't require target redirection due to the way the stack
of triggered abilities works (see the section on Hanna, Ship's Navigator for more details).
Returning Reap X times has a net effect of 2^^^^^^^^^^^^^^^^^^^^^^^^^^^^^^^^^^^X.
Avoiding infinites
Yes, we can return Reap with this, but we have nothing in the deck that can return cards from the
exile zone, so we are limited by the number of spare cards we have to exile.
Layer 36, Our Library
~30 random instants that don't let us go infinite, whose only real purpose is to be removed from
the game by Holistic Wisdom.
How it works
Make sure we get all the cards from our library into our hand (we've drawn 45 cards already. we
can draw the rest by returning Manamorphose to hand and copying it with Mirari).
Holistic Wisdom and Reap, incidentally, are precisely why we chose to use multiple less powerful
instants instead of
fewer more powerful sorceries for our card draw and early mana sources.
Okay, so this is the final layer, we can afford to be a bit more precise. We have 27 instants in the
deck that can be removed (i.e. aren't Blind with Anger or Reap or Twincast).
We're also not starting
from 0 before the first card is removed to Holistic Wisdom. In particular, one replication of
Reap
gets us about 2^^...(34 arrows)...^^( kinda large number ). This is larger than
2^^...(35)...^^( 2 ) = 4, and larger than 2^^...(35)...^^( 3 ) = 2^^...(34)...^^( 4 ). However,
it's probably smaller than or close to 2^^...(35)...^^( 4 ) = 2^^...(34)...^^( 2^^...(34)...^^( 4 ) ).
However, that number is exactly equal to 2^^...(36)...^^( 3 ), so it seems like that's our starting
point before we remove a single card with Holistic Wisdom; hence
we'll add 3 to our 27 instants we're removing.
Final result: about 2^^^^^^^^^^^^^^^^^^^^^^^^^^^^^^^^^^^^30.
Swing FTW
Well that's the combo at the moment; nothing left to do but to swing with a lot
of hasty Doubling Seasons. This is still a draft (I know the writing is bad in places).
Stay tuned for updates.
Discuss this
article (draft) on the forums
or the other forums